If you go kayaking often, your boat will eventually capsize or get overwhelmed with water. That’s why you need to learn how to do a T-rescue kayak. This technique can help you even if you or your buddy is the victim, but it requires the presence of a second party with a boat.
Your kayak can slip over in the middle of the water with rescue, not on sight. In such a situation, you need to stay calm and make yourself the priority. Do not worry about your equipment going underwater or your paddle flowing down the river.
Three kayak rescues exist: T-rescue, heel hook rescue, and paddle float self-rescue. We will discuss everything about the T-rescue in this post and leave the rest for another post. Let’s dive right in!
Table of Contents
What is T-Rescue Kayak Technique?

The T-rescue kayak is the most basic type of kayak rescue operation that prepares you for any eventualities such as rolling or flip overs. It helps you compose yourself underwater and to orient yourself when capsized.
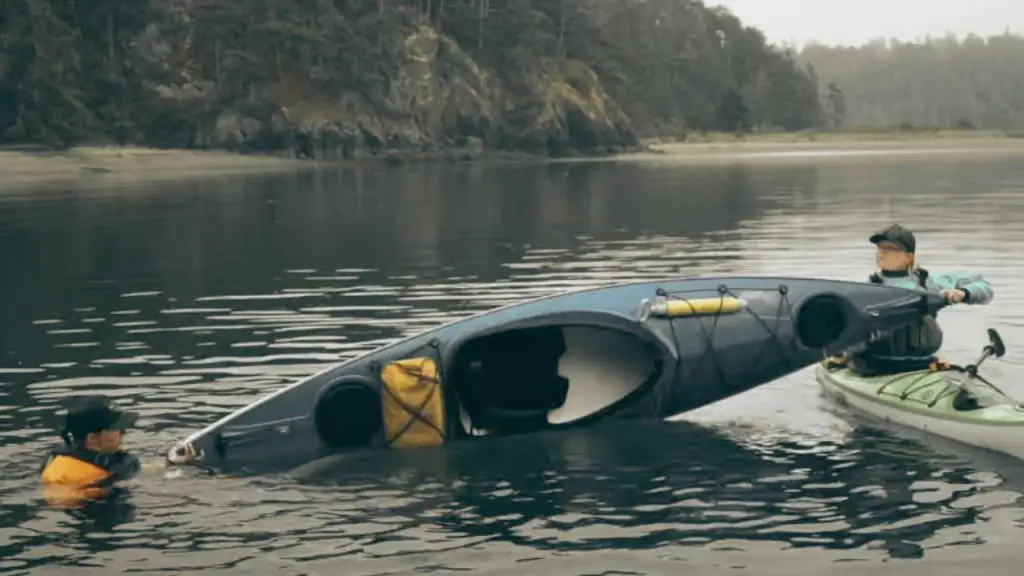
In this technique, a buddy or a rescuer approaches your capsized boat at a 90 degrees angle. That forms a T-shaped arrangement, the reason it is called a T-rescue. If you are the victim, you grab the bow of the rescuer’s boat. You will use it as support to get out of the situation, as we will outline later in this post.
The T-rescue is a relatively safe technique. It does not pose any danger to the rescuer’s boat as it remains stable and balanced through the operation. The kayak makes a stable fulcrum for the capsized boat, and the victim can easily access it.
How To Do a T-Rescue Kayak
T-rescue is a basic technique that every kayaker should learn. You can never tell when you are the victim or the rescuer to save a life. Fortunately, nothing is complicated in this technique, and everyone can master it. You can do it in just four discussions listed below:
Step 1: Righting a Capsized Kayak

This is the first step in the T-rescue kayak method, but the victim and the rescuer boats should first make the T-formation. The swimmer performs a wet exit while the rescuer approaches the overturned boat at a 90 degrees angle to form the crossing T-shape.
Remove any water from the capsized boat and turn it upright again. You can achieve that in the following sub-steps:
- The victim swims to the back of the capsized boat.
- The victim comes up while pushing down on the back of the capsized boat.
- At that very moment, the rescuer lifts and slides the bow of the overturned kayak and sets it on top, immediately in front of them.
- The combined efforts of the victim and the rescuer slide the capsized kayak such that its cockpit nears the hull of the rescuer’s boat. The duo then pushes and pulls the capsized boat back and forth to remove water from the cockpit.
- The team finally turns the overturned boat uptight and puts it back on the water.
Step 2: Repositioning the Kayaks

This next step is very challenging and should be carried out with care. Any mishap can take you back to square one. The objective of repositioning the kayaks is to create a stable platform for the victim and the rescuer.
Repositioning the two kayaks can be achieved in the following steps:
- Break the T-formation initially formed to remove water from the cockpit. You can do that by placing the two kayaks side by side and parallel. But ensure the rescuer’s bow is next to the boat’s stern.
- The rescuer takes the victim’s paddle and places it on the boat decks. But if it cannot be seen, think of retrieving it later when the rescue operation is over.
- The rescuer leans in and grabs the back of the cockpit’s coaming and the static deck lines on the far side of the victim’s boat to make it stable. The victim should also have a clearance on the cockpit to re-enter.
- The rescuer keeps a firm grip on the victim’s and rescuer’s boats while both lean inwards.
Step 3: Get Back into the Cockpit
The goal is to allow the victim to get back into the boat. It is the last challenging step that also requires great concentration and care. You can do it in the following steps:
- If you are the victim, grab the static deck lines on the far side of the cockpit. But if you can’t access it, you can alternatively get hold of the coaming on the far side of the cockpit.
- Kick in the water as hard as you can and pull yourself up out of the water with your belly flopped on the kayak. You can also do a dolphin kick using your legs to pop out of the water.
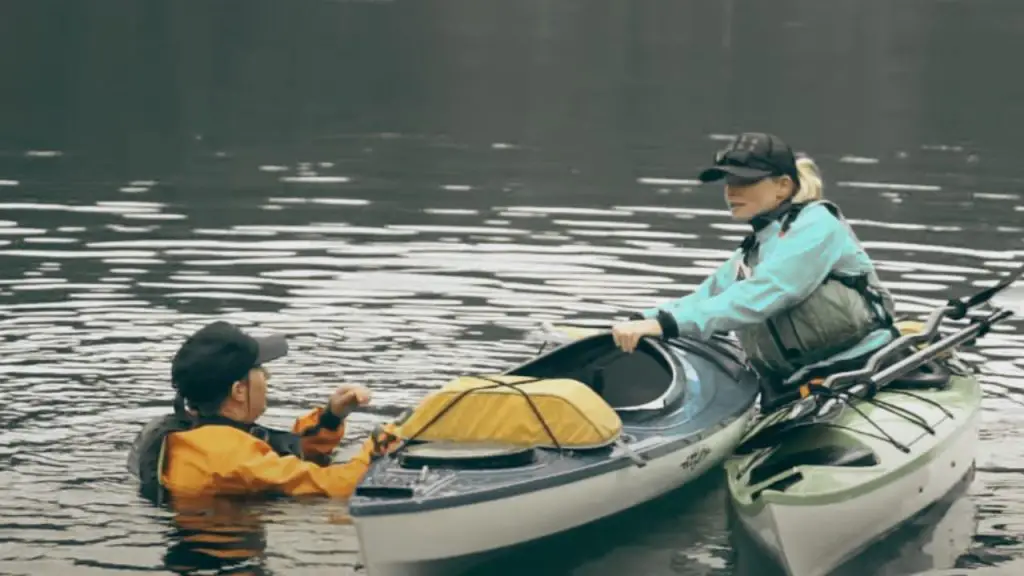
- Use the repositioned boats for support and lift your legs out of the water as the rescuer still holds the boats. Slide your legs back into the cockpit before turning around and sitting upright.
- The rescuer stops holding the boats, and the just rescued victim embarks on removing any water from the cockpit. You can use a sponge or bilge pump to do that.
Seattle Sports Breakaway Bilge Pump
Step 4: Handing Buddy’s Paddle Back
The last step is to get your paddle back and choose to either continue your expedition or head to the shoreline. The rescued victim reattaches the spray skirt, and the rescuer hands over the paddles. The rescue process is complete.
How do you let a rescuer know you are in trouble and need your help? You can still be in the cockpit or out of it, which depends on how it all happened.
When Kayakers Still in the Cockpit
Alert a buddy or a potential rescuer nearby about your situation by clapping your hands to let them know you need help. Once you have their attention, you can run your hands along the sides of your kayak to indicate the position to the rescuer.
Your rescuer will present their bow for you to hold on to and learn more about your situation. What follows are the steps of the T-rescue outlined earlier.
When Kayakers Get out of the Cockpit
This is the most common when a kayak overturns. If you are in that situation, just alert a rescuer. You and the rescuer should know the T-rescue kayak technique and carry it out as outlined in the previous sections.
T- Rescue Kayak Usages

The T-rescue kayak technique does not work in all situations. It is only applicable where there is a victim and a rescuer close by.
This method starts with the victim on a capsized boat asking for help from a rescuer. The two then work together to turn over the capsized kayak and help the victim back into the cockpit.
T-rescue can be an unsafe method for beginners. As a result, you should perfect your skills in a pool or a small pond that does not pose more danger. Don’t go deeper into the wavy waters if you are not good at it yet.
Alternatives to T-rescue include paddle float self-rescue and heel hook rescue. These two may be applicable in situations where the T-rescue is impossible to execute.
NRS Deluxe Touring Safety Kit
FAQs
How to rescue a kayak alone?
You will need a paddle float and bilge pump to rescue your capsized kayak alone. Just inflate the paddle float and turn your boat upright, cockpit facing up. The next step is to pump water out of the boat and climb back into the cockpit.
How do you self-rescue an inflatable kayak?
The steps largely remain unchanged. You will need a paddle float and bilge pump to help you turn over the boat and remove water from the cockpit. You can also have a self-rescue ladder as part of your kits when going out to the deep waters alone.
How do you use a kayak self-rescue ladder?
A kayak self-rescue ladder makes it easy to turn back into your boat. Hitch the top end of the ladder to your kayak handle or cleat and secure it and simply climb over. Fortunately, different kayak ladder designs to choose from exist.
How do I get back into my overturned kayak?
You can get back into an overturned kayak if you have a rescuer. Use a T-rescue method to turn over the capsized boat and get back into it, as outlined in this article. But you can also consider the heel hook rescue method.
Wrapping Up
T-rescue is a basic technique every kayaker should learn. It requires two people: the victim and the rescuer and their boats. It helps right a capsized boat and gets the victim back into the kayak. However, it can be risky and should only be practiced in calm, relatively shallow waters. It is a special skill that can help save a life.
Thank you for your time reading this article at Windpaddle. We appreciate your time and kindly ask you to share it with fellow paddlers to help us spread the information.


