Using a J rack is one of the most convenient ways to transport a kayak. However, if this is the first time you are going to load your kayak on a J rack, you may need some instructions for lifting and securing the kayak to the J rack.
Transporting kayaks can be a challenge for many kayak owners. You can use a truck, trailer or SUV to transport your kayak to your favorite spot. Transportation is easy if you have an inflatable kayak. But if you have a hardshell kayak, using a J rack is the smartest way to carry your kayak.
In this post, we are going to discuss everything you need to know about loading a kayak on a J rack. Hopefully, here you will find some useful tips and ticks.
Table of Contents
J Rack Installation
Small cars, SUVs and trucks are the most suitable types of vehicles for installing a J rack. If the roof of the vehicle is too high, you will find it pretty hard to lift the rack up to that height.
Your vehicle should be already equipped with a type of rack to which you can attach the J rack. One side of the J rack is shorter than the other. As a rule of thumb, you should place the longer side of the rack facing out. In such a case, however, you will have to load the kayak from the back of your car.
If you do not want to do that, consider the alternative orientation: place the shorter end away from the center. This will allow you to mount your kayak from the side of your car. You will find the job easier because you will be able to step up on your car’s runner in case you need some extra height.
If security is a concern, choose a J rack with a locking mechanism. Yes, it is a bit more expensive, but you will not have to worry about the security of the rack.
In general, no additional hardware is needed for installing a J rack. However, you must properly tighten the screws that come with the rack.
AA-Racks 2 Pair J-Bar Rack for Kayak

How To Load a Kayak on J Rack
To some extent, the procedure of loading a kayak on a J rack depends on the type of vehicle and the type of rack. If your kayak is heavy, it’s a good idea to lift and load it with a buddy.
In general, the procedure involves three steps: situating the kayak on the ground, lifting the kayak either from the side or from the rear of your vehicle, and securing it to the J rack.
Step 1: Situate Your Kayak in an Advantageous Position on The Ground

Before you lift the kayak, position it on the ground. This way, you will find it easier to lift the kayak and place it on the J rack without having to flip the boat once you have lifted it from the ground. It reduces the risk of dropping the vessel.
Position the kayak with its face up if you find that advantageous. If you are going to secure your kayak to crossbars, flip the vessel over, with its face down.
Step 2: Lifting The Kayak
As we have stated, you can lift the kayak from the side or the rear of your vehicle. Let’s see what the procedure should look like.
Loading from the Side
Loading your kayak from the side of your vehicle is easier if you are doing it with a partner. This is because as you lift the vessel, you will have to rotate it toward you. If the kayak is relatively large, you will find it hard to maneuver the vessel.
Stand at either end of the kayak (stern or vessel). As you lift it, set the gunwale onto the J rack. Once you have managed to lift the kayak at the height of the J rack, it’s easy to rest the vessel against the side of the rack. Then you can just push the boat into place.
Loading from the Rear
If you are lifting the kayak by yourself, loading it from the rear of your vehicle is likely to be easier than loading it from the side. This approach is also suitable for lifting a heavy or lengthy kayak.
When the kayak is on the ground, its bow should be aligned with your vehicle’s bumper. Consider placing a pad beneath the stern to protect it from damage.
Once you have managed to lift the bow high enough, you will have to slide the kayak forward. Therefore, it’s a good idea to place the pad a couple of feet away from the stern. The point is to make sure the kayak’s bow is securely set in the channel of the rack. By placing the pad slightly forward of the stern, you will also prevent the kayak from sliding off as you push it forward.
Swing around to the stern when the bow is secure in the channel of the J rack. As you rotate the kayak, lift the stern carefully, making sure the gunwale is securely attached to the channel.
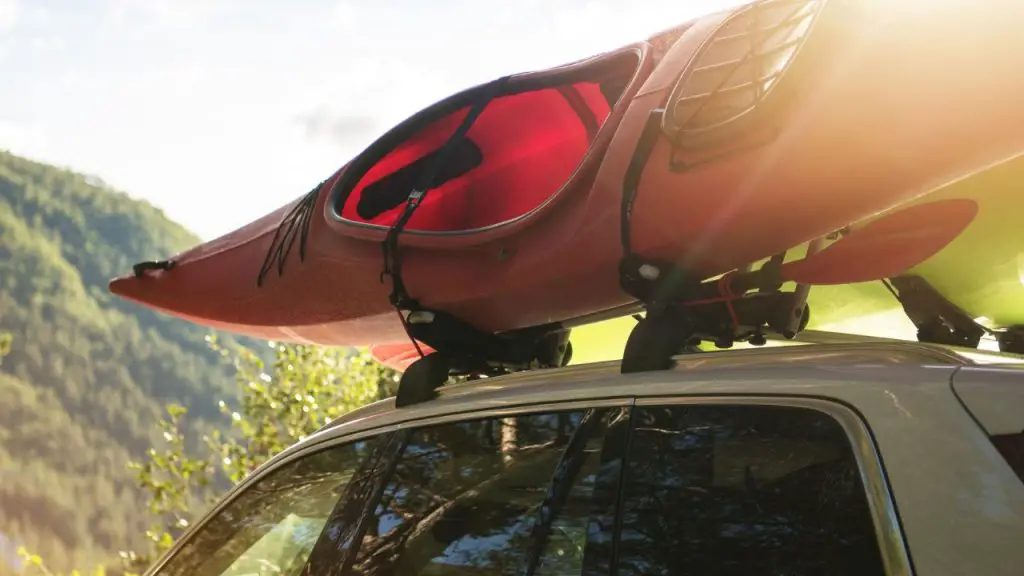
Step 3: Secure Kayak Down
You can use cam straps to secure your kayak to the rack. Just be sure to tighten the straps carefully. If you tighten them too aggressively, you may end up damaging your kayak.
Place both the straps on top of your boat. Depending on the length of your boat, and your height, this might take some effort.
The straps should be positioned in such a way that the cam buckles of both ends are aligned with two sides of the crossbar. Position the buckle in a way that you can reach it and tighten the strap. Pass the other end of the strap over to the crossbars and attach the strap to the buckle.
Once the strap has been passed through the buckle, pull tight. Then repeat the process to secure the rear of the kayak.
AUGO Ratchet Tie Down Straps

Pros and Cons of Using a J Rack
While a J rack can make it super easy to transport a kayak, these racks may not appeal to all kayakers. Here are the advantages and disadvantages of using J rack:
| Pros | Cons |
| – A J rack makes it easy to transport a kayak, even if it is a relatively large one – It leaves the truck bed empty, allowing you to put other gear thereJ racks are cost-effective. Starting price is around $40 – When a J rack is not being used, you can fold it. So, it will not prevent your car from fitting in the garage | – Loading a kayak on a J rack is physically demanding. While it’s pretty easy for some, it can be a bit challenging for others – If crossbars are not already installed on your vehicle, installing a J rack can be expensive |
Alternative Ways to Transport a Kayak
If you own a pickup or trailer, you can strap your kayak to the back of your vehicle. You will not have to invest in a J rack if you directly strap your kayak to the crossbars. Yes, some people actually choose to do it. It’s super easy to transport an inflatable kayak, so you may consider investing in one.

FAQs
How do you load a heavy kayak on J rack by yourself?
Before you lift your kayak, situate it in an advantageous position on the ground. Then you can load it either from the side or the rear of your vehicle.
If the kayak is too heavy or lengthy, consider doing it with a buddy. Once you have placed the kayak on the J rack, secure the boat to the rack with straps.
How do you use a J style kayak rack?
A J style kayak carrier has to be attached to the crossbars installed on your vehicle. Once you have installed the J rack, you have to load the kayak on the rack and secure the vessel with straps.
What is the easiest way to load a kayak on a roof rack?
The easiest way to load a kayak on a roof rack is to lift the vessel from the side of your vehicle. This allows you to step on your car’s runner if you need some extra height.
How do you load a kayak by yourself?
Bend at your knees. Hold on to the front part of the kayak with one hand and the back part with the other. Bring the vessel slowly onto your thighs, using a sliding motion. Keep your knees bent. To give the boat support, lift up your right knee. Then bring the boat over to your head and slowly place it on the J rack.
Wrapping Up
It’s pretty easy to load a kayak on a J rack if you do it with a buddy. Yes, you can do it by yourself, but it will take a little bit of practice. With that said, it all depends on the size of your kayak. Lifting a small kayak is not physically demanding at all.
The key is to focus on the fun part and enjoy the process. We have discussed the step-by-step procedure, and we hope now you are ready to get started.